Adoration Check-In Kiosk Setup
What do I need to get the kiosk running?
A great benefit of We Adore Him is the ability to track adorer attendance instantly and automatically. On this page, learn how to set up your Adoration Check-In Kiosk in the back of your chapel.
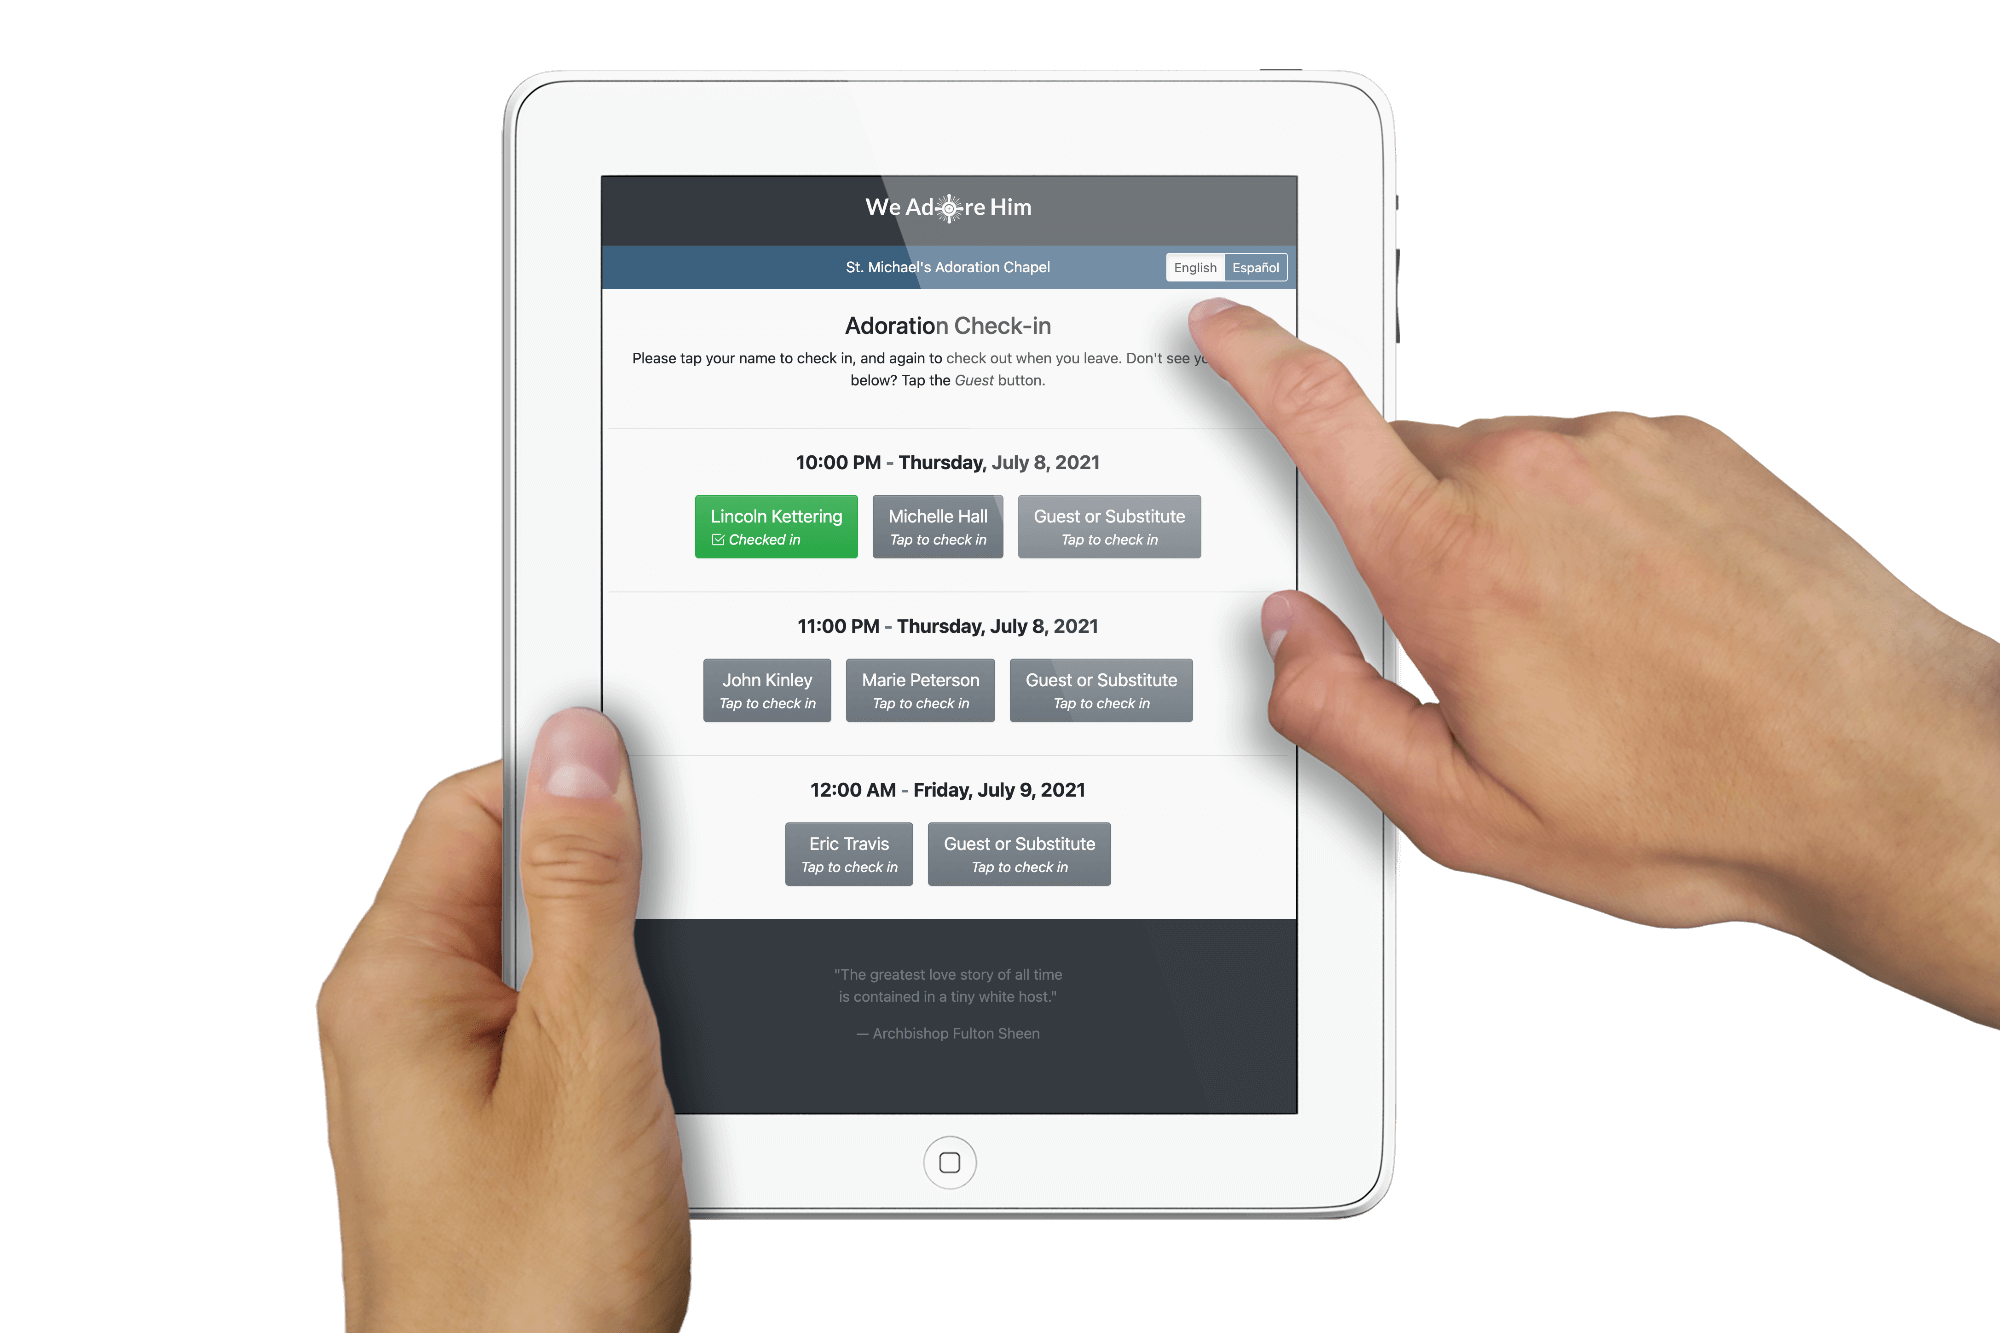
This is not an "app" downloaded from an app store. Instead, it's a technology called a web app. It behaves like a native app, but you install it by visiting a website in your tablet browser.
What You'll Need
-
Tablet device. We recommend an iPad manufactured in the past 3 or 4 years that still receives software updates. At a minimum, it should run iPadOS 17 or newer. Here's a list of iPads with their supported iPadOS versions.
A basic model works great. Your kiosk is a simple web page, so it doesn't need a large screen, a fast processor, or much storage. Look for the least expensive iPad that still receives software updates. A refurbished model is perfectly fine, as is a hand-me-down from a parishioner.
We strongly recommend an iPad. However, you might be able to use an Android tablet. To enable the equivalent to iPad's Guided Access feature on Android, use Screen Pinning by following these instructions.
- Electricity. The tablet needs to remain connected to a charging cord and an outlet at all times.
-
Wi-Fi connection or data plan. The kiosk talks to your We Adore Him website constantly, so the tablet needs to stay online in the chapel. Wi-Fi is the usual choice. If the chapel has no Wi-Fi, a cellular iPad with its own data plan works too.
Adorers can still check in when the internet drops, using the offline message and QR code the kiosk displays.
-
A way to hold and secure the tablet. You have two good options here.
Best is an enclosed mount that locks the tablet inside a frame and bolts to a wall or table. This holds the tablet and secures it in one piece of hardware, so nothing else is needed. Search Amazon for iPad kiosk enclosure or anti-theft tablet wall mount. Before ordering, confirm the mount fits your exact tablet model, since iPad sizes change often.
Otherwise, use a simple tablet stand together with a security cable that anchors the tablet to something immovable. Search Amazon for tablet security cable lock. Avoid a folding desk stand, which tips over easily.
After gathering these items, you're ready to set up the tablet in the back of your chapel.
Preparing Your Tablet
Let's change the settings on your tablet to optimize it as a kiosk. The following instructions are for iPads running a recent version of iPadOS. (Please find comparable settings for other tablets and older versions.)
-
Set up Guided Access. This prevents a
visitor from exiting the Adoration Check-in app on the
tablet. Apple has
its own instructions if you get stuck.
- Go to Settings » Accessibility » Guided Access.
- Toggle on Guided Access and Accessibility Shortcut, and set Display Auto-Lock to Never.
- In Passcode Settings, set a passcode and toggle off Face ID or Touch ID. (If either is enabled, you might accidentally exit Guided Access and not realize it; thus, we recommend disabling them.)
- Write the passcode down. You'll store it on your website in the next section, so any admin can find it later if the tablet needs attention.
-
Disable auto-lock. This prevents the
tablet from automatically locking after so many minutes of
activity.
- Go to Settings » Display & Brightness » Auto-Lock, and choose Never.
-
Remove the device passcode. This is the
passcode that unlocks the tablet itself, not the Guided
Access passcode. Without it, the tablet returns to the home
screen on its own after a power outage instead of waiting
at a lock screen nobody can get past.
- Go to Settings » Face ID & Passcode or Settings » Touch ID & Passcode, and choose Turn Passcode Off.
- Only do this on a tablet dedicated to the kiosk, and keep it physically secured in the chapel.
-
Show one app at a time. This hides the
multitasking controls at the top of the screen.
- Go to Settings » Multitasking & Gestures, and choose Full Screen Apps.
- On older versions of iPadOS, this setting is a simple Off toggle instead.
-
Disable automatic updates. This prevents
the tablet from automatically upgrading software in the
background, potentially requiring a restart.
- Go to Settings » General » Software Update » Automatic Updates and toggle off Install iPadOS Updates.
- Also, go to Settings » App Store and toggle off App Updates.
-
Keep the Wi-Fi connection stable. These
settings stop your router from treating the tablet as a
brand new device and dropping it.
- Go to Settings » Wi-Fi, tap the information icon next to your chapel network, and set Private Wi-Fi Address to Fixed. On older versions of iPadOS, this is a simple toggle you can turn off instead.
- Back on the Wi-Fi screen, toggle off Ask to Join Networks so the tablet stays on your chapel network.
-
Set the date and time automatically. A
tablet with the wrong clock cannot connect securely to your
website.
- Go to Settings » General » Date & Time and toggle on Set Automatically.
-
Disable Bluetooth. This prevents your
tablet from potentially connecting to an external keyboard
and then hiding the on-screen keyboard for your users.
- Go to Settings » Bluetooth and toggle it off.
-
Disable keyboard sounds. This prevents the
tablet from making noise when a guest adorer is typing
their name.
- Go to Settings » Sounds & Haptics » Keyboard Feedback.
- Toggle off Sound and, if your tablet offers it, Haptics.
- On older versions of iPadOS, look for a Keyboard Clicks toggle directly under Settings » Sounds instead.
-
Disable emoji input. This prevents adorers
from entering emojis in guest check-ins.
- Go to Settings » General » Keyboard » Keyboards.
- Tap Edit, then the red "minus" icon next to Emoji, then Delete.
Installing the Web App
With your tablet configured, it's time to turn on the kiosk and install the web app.
-
Enable the kiosk on your website. Until you do this, your kiosk login details are hidden.
Turn on the Enable the Adoration Check-In Kiosk setting at Admin » Settings » Attendance.
A Kiosk Installation section now appears with everything you need:
- Kiosk URL, the website address you'll open on the tablet.
- Kiosk login, the first part of your We Adore Him website address.
- Kiosk password, which you can change at any time. We recommend a short series of numbers.
- Guided Access passcode, where you enter the tablet passcode you wrote down earlier. This field is only a place to record the passcode. It has no effect on the kiosk itself.
-
Navigate to the web app. Open Safari on the tablet and visit https://kiosk.weadorehim.com. You don't need to log in yet.
-
Install the web app. Click the Share icon (a box with an up arrow). Tap Add to Home Screen. If you don't see this option, swipe the buttons to find it.
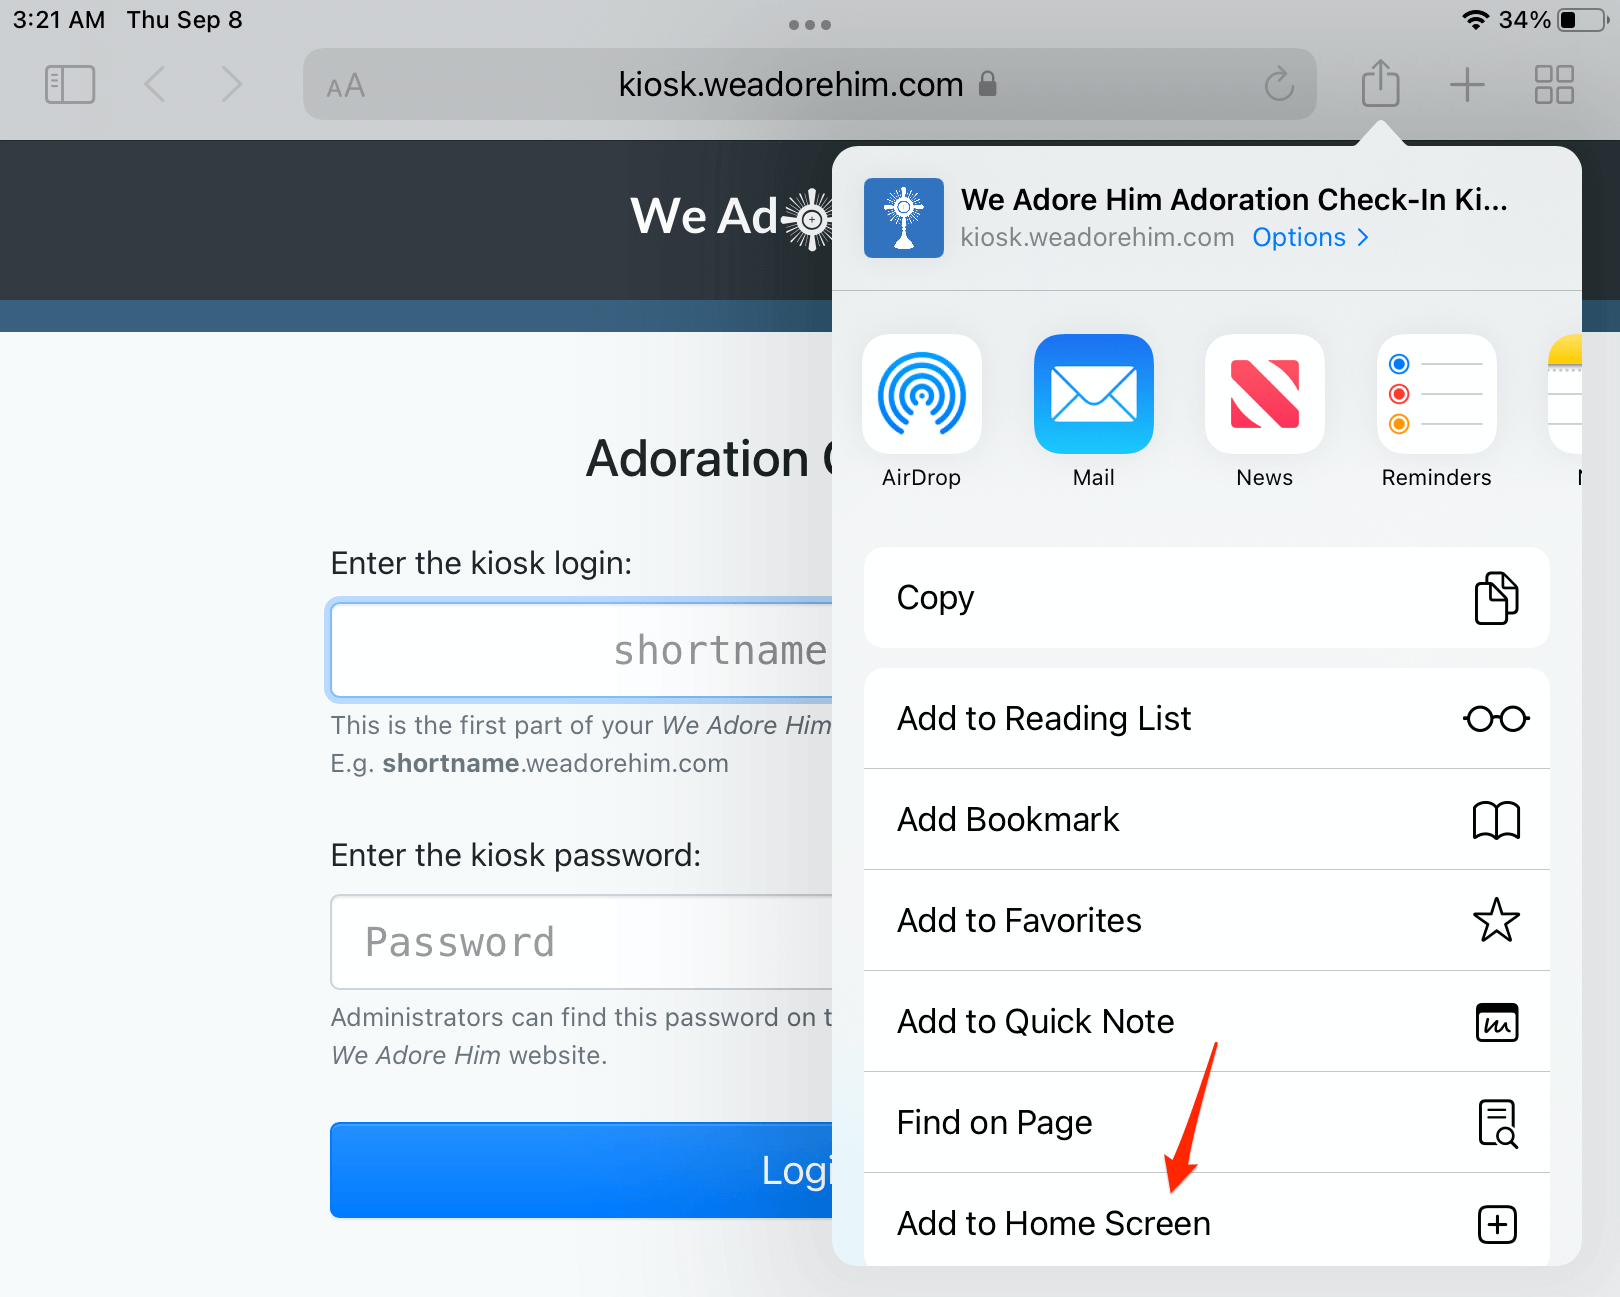
Add the web app to your home screen -
Open the web app. Visit your home screen and tap the new Adoration icon. It opens like a native, fullscreen app. Enter the Kiosk login and Kiosk password you found earlier. The password is case-sensitive.
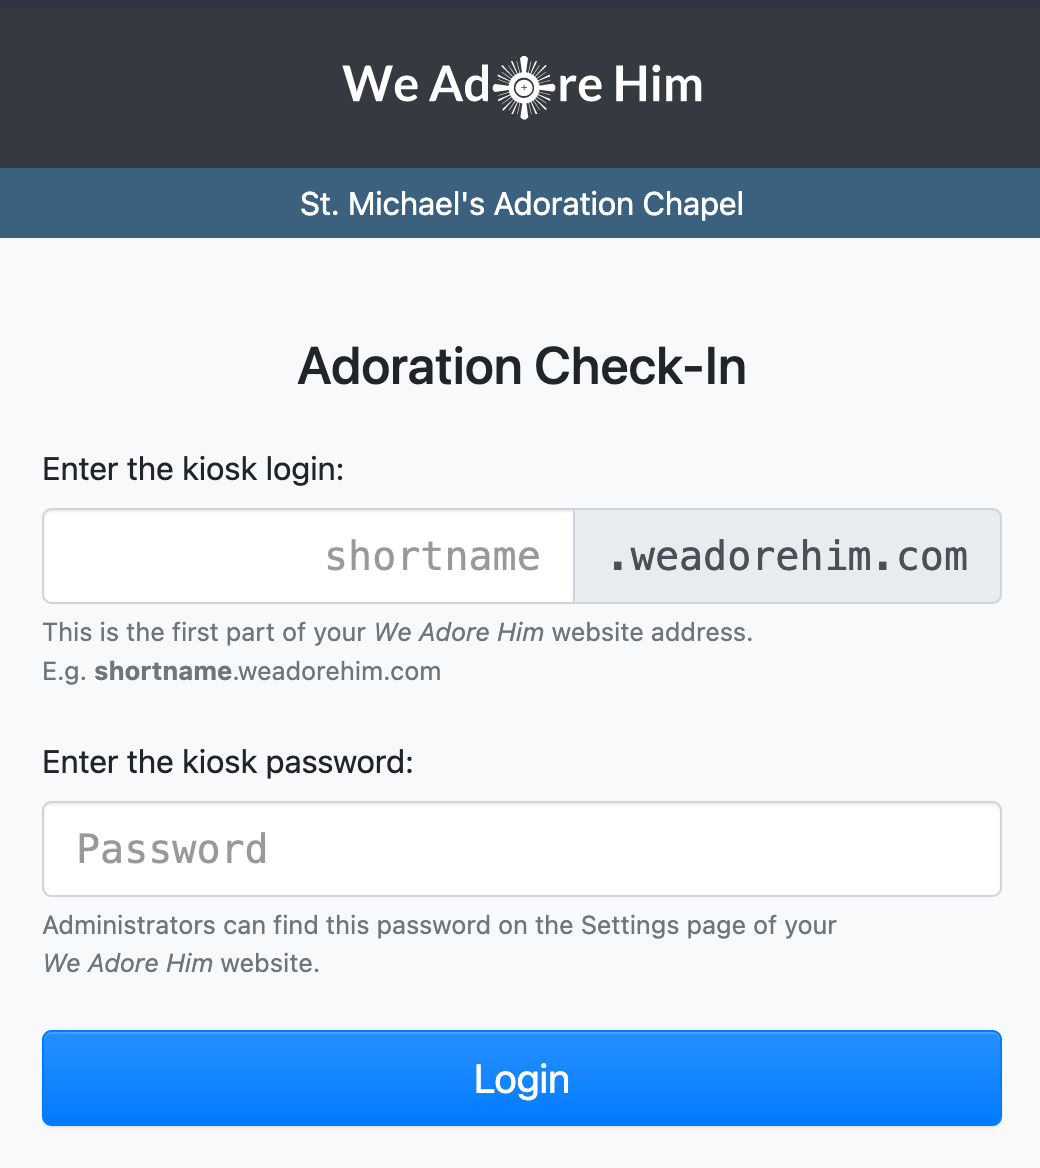
Login to the kiosk -
Choose the location. If your parish offers adoration at more than one location, the kiosk asks where it is installed. Tap the correct location. Skip this step if you have one location.
-
Enable Guided Access. Triple-click the Top or Home button to enable Guided Access mode. Tap Options at the bottom-left and toggle off the Sleep/Wake Button or Top Button.
-
Mount the tablet. Connect it to power and secure it in its mount or stand, so nobody can walk out of the chapel with it.
Your tablet is now an Adoration Check-In Kiosk! Adorers can check in by tapping their name (or the Guest button), and your We Adore Him website has a complete, live-updating attendance history.
Congrats! You just installed a super-sophisticated system to make attendance tracking a breeze. 🎉
Configuring Your Kiosk
Your kiosk works out of the box, but you can change what it displays in the Kiosk Settings section at Admin » Settings » Attendance.
- Custom message displays a message at the top of your kiosk.
- Show hour captains displays the names and contact information of hourly captains, so adorers know who to contact during adoration.
- Name format controls how adorer names appear on the kiosk.
- Show adorer phone numbers displays phone numbers for scheduled adorers who haven't checked in yet, so an earlier adorer can contact a late one before leaving.
- Autocomplete names on guest check-ins makes it easier to match guest visits to existing adorer accounts.
- Allow adorers to check out lets adorers tap their name again to check out when they leave.
A few more things worth knowing about your kiosk:
- If you enable more than one language, a language switcher appears at the top of the kiosk, and it returns to your default language automatically.
- When the internet goes down, the kiosk shows your offline message and a QR code so adorers can still check in.
- You can also print a Mobile Check-In QR Code for adorers who prefer their own phone.
- Guided Access does not survive a restart. After a power outage or a software update, someone has to reopen the Adoration app and turn Guided Access back on. We recommend asking one person at your parish to own this.
Troubleshooting
If you experience problems with your kiosk, please see our troubleshooting steps.